One of the most important aspects of starting a horse under saddle is the role of mouthing education, as done well this can make that difference between creating a partnership with the horse or just hauling it around.
Starting a horse for something as important as mouthing without first introducing it to basic ground control exercises would be like asking the horse to do flying changes before it could strike off on the correct canter lead, and would create confusion because the basics were not established.
Therefore, before commencing, ensure the horse has a basic understanding of ground control exercises - performed in the halter – which would include lateral flexion, hindquarter control, side passing and circling. These exercises will introduce softness in the halter and therefore a willing partner with which to start the mouthing lessons.
A horse needs to be supple through the head and neck, ribcage, shoulders and hind quarters and, to aid in true softness in the vertical (up and down) for collection and asking for a frame, it does need to be soft to lateral flexion (side to side). This suppling can be started from day one of the mouthing education and to achieve it Dan James and Dan Steers – from Double Dans Horsemanship - use a one rein mouthing technique before advancing to two reins in a driving manner.
In the first part of this two part article series on mouthing the young horse, Dan Steers explains the initial one rein lateral exercise, which needs to be performed in a roundyard.
“To allow full utilisation of this method of education, specific gear is required, which includes a bridle with a full mouth bit, large D ring or a sleeve ring and preferably 5/8” thickness mouth piece. This will make the horse more comfortable with the exercise by allowing more even pressure to be applied to the side of its mouth, plus it will reduce the risk of the bit pulling through the mouth. The long rein used is 10mm diameter yachting rope in a 8m length with a knot at the end piece to fasten to the bit or roller. And the final piece of equipment is a roller, which has strong rings and multiple adjustments.
To prepare for introducing the bridle, teach the horse to lower its head while it is still in the halter. This is done by downwards halter pressure and release the pressure immediately the horse gives to the pressure. Continue this exercise until it understands what is being asked. This will make it easier to place the bridle in the horse’s mouth when it comes time.
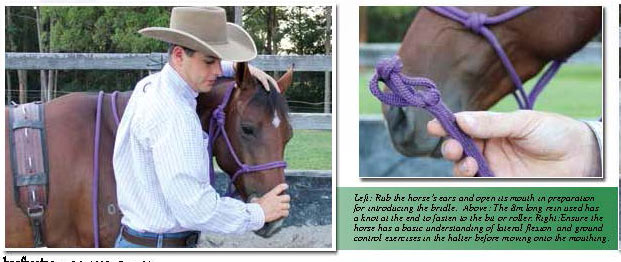
Make sure both the horse’s ears can be rubbed without resistance before placing the bridle on, and check the bridle will be roughly the right size for the horse - any further adjustments can be made once it is on.
To teach the horse to understand it is required to open its mouth for the bit, gently place a thumb in the corner of the mouth and softly wiggle it until the horse opens its mouth. Place one hand over the top of the horse’s head and use the other hand to guide the bit into its mouth. Once the horse has accepted the bit in its mouth, gently pull it over the ears and into place. Ensure that the bit is fitting comfortably before progressing.
YIELDING TO PRESSURE
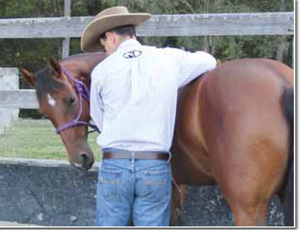
In the initial ground control exercises the horse will have already learnt to yield to pressure from the halter so, once the bridle is fitted, the next step is to introduce the yield to pressure on the ground by standing at the horse’s shoulder and asking it to bend its nose around with a single rein connected to the bit. This is achieved with gentle, gradual pressure and release. The horse needs to be rewarded for its effort, no matter how small that effort, as long as it is what it is being asked for.
Initially the rein may be released when the nose bends off centre in the direction asked. With repetitions, the horse should be expected to bring its nose all the way around to its shoulder. The rein must only be released when there is no weight or resistance from the horse, as this is what encourages softness, rather than the horse been rewarded for leaning against the bit. A good indicator that the horse is responding well is when the rein is released and the horse hesitates before returning its head to the centre position, rather than snatching its head away from the rein contact.
This process can be repeated on both sides until the horse has a firm understanding that it needs to give to one rein pressure. If the horse moves its feet during this exercise then maintain the pressure on the rein, move with the horse - staying next to its shoulder - and then only release the rein as a reward when the horse is standing still with its head softly flexed to the side.
 |
Right:
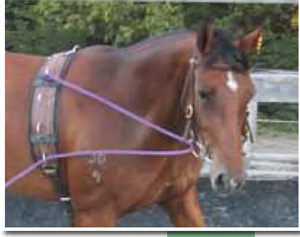
The long rein attaches to the top ring of the roller, goes through the bit and back through the bottom ring and then to the handler
Left:
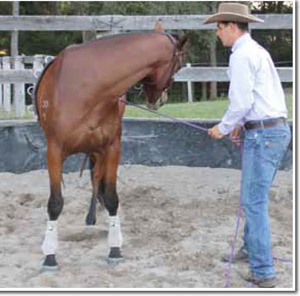
Taking the nose just off centre.
Right:
Once the horse comes to a complete stand still approach it at the shoulder before releasing the rein. |
|
| |
ONE REIN STOP
Once confident that the horse has an understanding of this lateral flexion it is then time to teach the one rein stop from a walk.
With the horse in the roundyard, a single long rein needs to be attached to the top ring of the roller at the wither, then it runs down to the bit and through to the lowest ring on the roller. Once set up, the horse is asked to walk around the outside of the roundyard - with the rein on the inside - by stepping behind the line of its shoulder and creating forward impulsion by using a driving or lunge whip behind the horse.
Once it is walking freely around the yard the contact on the rein is taken up gently and the horse’s nose is asked to come to the inside of the circle. Wait until the horse comes to a complete standstill with its nose flexed off centre and then it can be approached at its shoulder while even pressure is maintained on the rein. Taking hold of the lower rein, ask the horse to take its nose to its shoulder, as previously practiced, and release when it follows the rein and gives its nose with no pressure in the bit.
If the horse initially spins around when the flexion is first asked of it and it becomes tangled within the long rein, release the rein and allow the horse to free itself. The horse then needs to be immediately approached at the shoulder and the flexion needs to be asked from a standstill, as it does not as yet have a solid understanding of what it is being asked.
Once the horse is comfortable with the slight lateral flexion of the nose coming off centre at the walk, ask the horse for full lateral flexion of nose before the horse is approached at the shoulder. The rein must always be manually released from the shoulder to ensure the horse does not learn to snatch the rein away to gain release from the pressure.
Once the horse is stopping solidly from a walk and going both directions in the round yard more can be asked of it. Start the horse trotting on the circle and then ask for the one rein stop to the inside from a trot. As it becomes more confident with this, the lateral flexion can be asked more abruptly to simulate the pressure that would be placed on the horse if the one rein stop was needed during riding e.g. if it gets a fright and attempts to bolt or buck. This exercise can then be taken to the next step b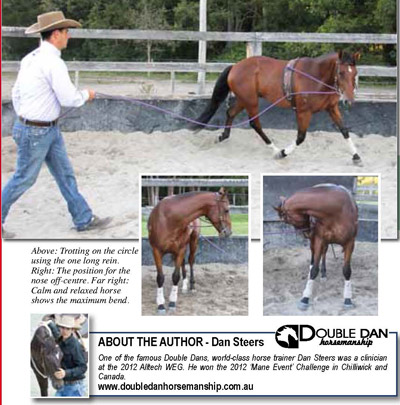 y asking for the one rein stop from the canter. y asking for the one rein stop from the canter.
The final stage of working with the single long rein is to ask the horse to canter comfortably around the roundyard with the one rein, then check it back by applying light pressure to the inside rein. Once it is in a fast trot immediately ask for the one rein stop to the inside, just like the previous exercises in the walk and trot. When working with young horses I have found they are more balanced in a trot but I like to ask them to move out at a canter.
These exercises teach the horse to yield from bit pressure rather than lean and resist. They also start to teach lateral flexion, which will give the horse a great foundation for its ridden career.”
Next article - mouthing the horse with two reins.
|